Finally! A project completed!
It all started with a badly timed leaking water line
+ 1 plumber
- loads of cinderblocks
+ inspiration
+ 96 stones
x 100lbs each
+ a new truck
+ several loads of sand & gravel
+ Travis' skills =
Warning: These pictures may make you dizzy with all my turning and clicking.
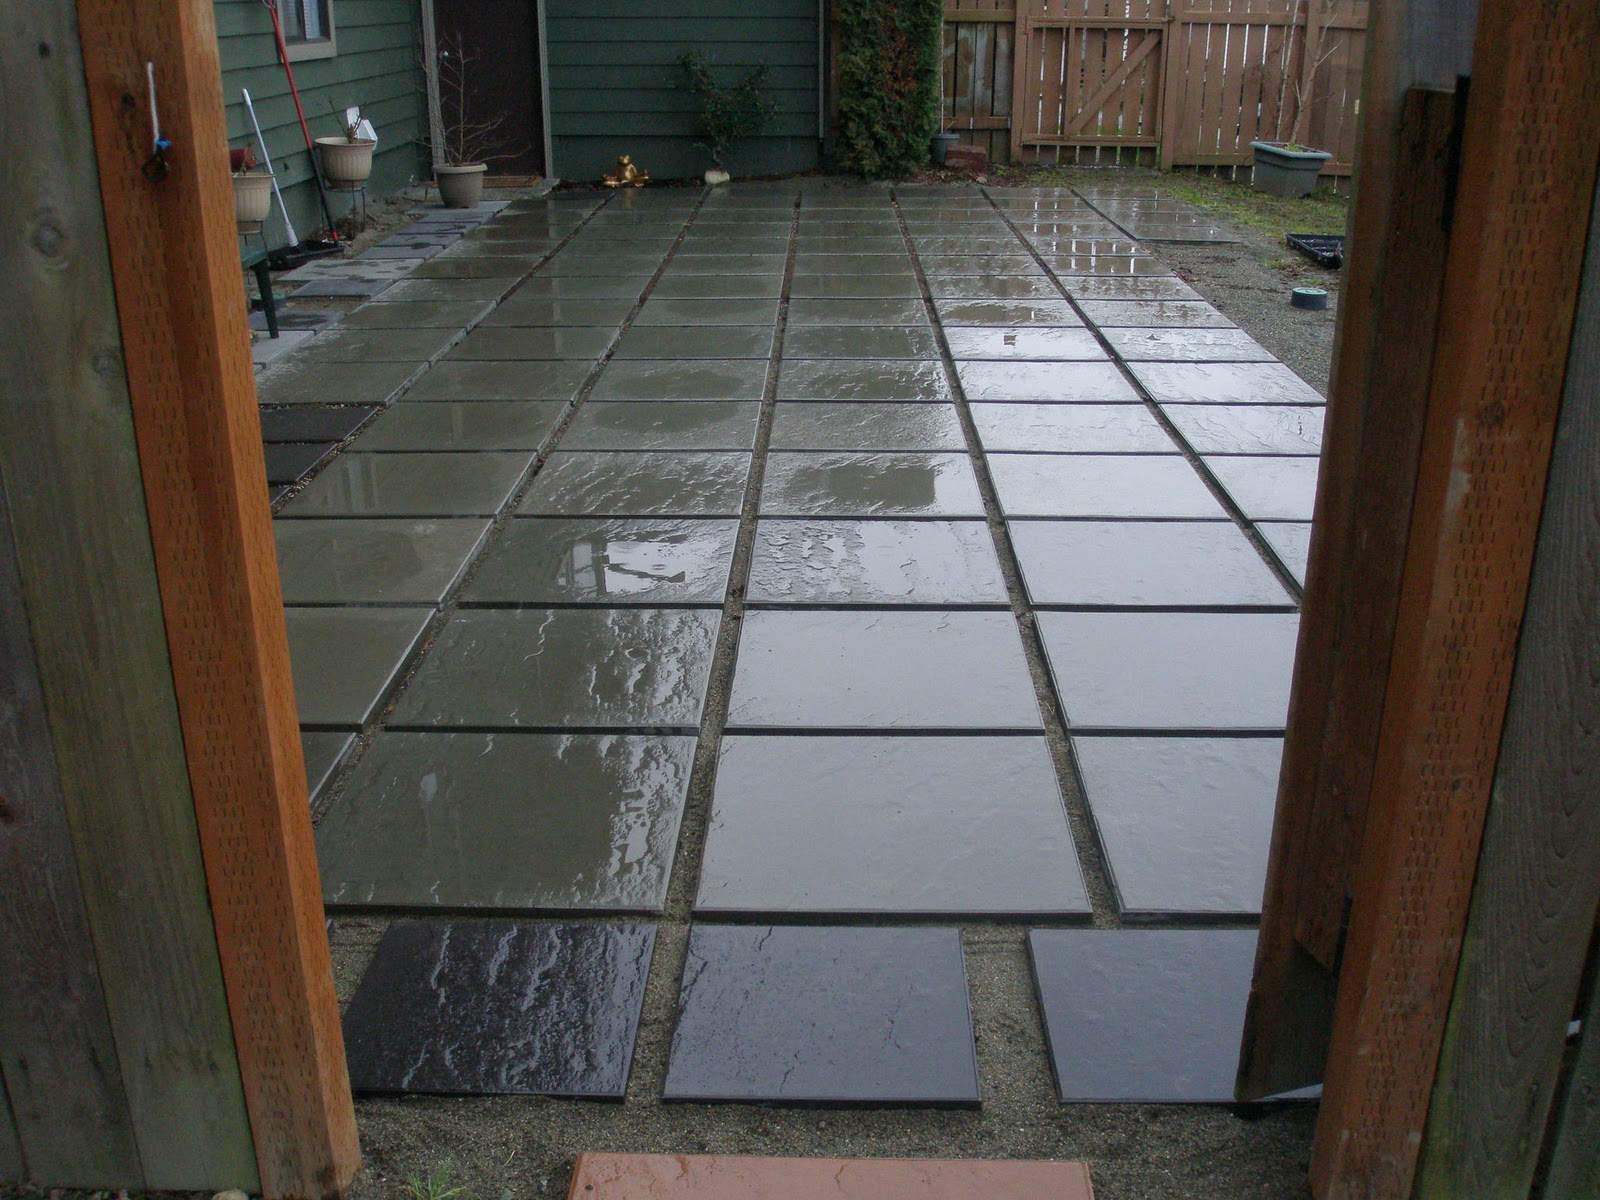
We loved the look of the little charcoal stones, but when they are dry they look terrible. Good thing we get alot of precipitation. You can see in this picture a dry stripe from the gate being opened when it started raining. Pretty shiny black turns in to BLAH gray once dry.
 |
| North side looking east |
 |
| Facing north |
It was slightly snowing the day after completion. That is one of the reasons it took so long to finish.
It was only about 20 stones short all thru the winter.
 |
| facing south |
I like things to be even and centered but unfortunately we weren't this far ahead in our plan when Travis installed the underground hose. I am more than happy to fore go my need for even since I won't have a hose stretched across the patio every spring/summer/fall to water the garden.
 |
| East Side |
| The edges aren't pretty yet--that is my job. Along with filling the spaces with soil and ground cover...again  |
| From the slider-facing ---oh who cares! |
I gained an extra 60 sqft of garden space! Here it still looks unfinished to me since the sand/gravel is still down. I'm not sure how I'm going to handle all that extra space once we get started on the garden.
Last year we had less than 1/2 the ground tilled before planting time, this year we plan on finishing the space. From 150 sq ft to close to 600!
 |
| Garden side |
Must be evergreen, full sun and drought tolerant since it is under the eaves a bit.

I was soo proud of my groundcover last October. Little star creeper is a pest to some gardens but not mine. It is a steppable, its green and has little flowers... will even survive down to 0 degrees..
Found a couple little snails during the week but didn't know the damage they could do.
One day I noticed a small patch was missing... and within a week it was gone.
Pic on left was October, right was Feb.
Now I get to go buy it all again and try again.
Along with learn snail control methods.


This is an unknown shrub that came with the house. Anyone know what it is?
It needs to be shaped badly and possibly moved.
It would probably be a death sentence If I tried that with out details...but then again--look at the ground cover I killed.

Rewinding
Here is the start and finish of 2010

And here is where he left it in September. Back when my ground cover was still thriving.

Quite the weight lifted from his shoulders. This was the day he finished the patio:
 |
| Since Travis was "resting" I decided to snap some pics of my daffodils |
More blogs to come! I (almost) promise!
Wow, April, another job crossed off the list! It looks fantastic, I am so jealous--we never get any outdoor work done around here much before May. You're going to laugh, but I've never heard of little star creeper...can't wait to see it filling in the spaces. You've gained a lot of garden space, this is going to be a fantastic year for you, it will be fun to see your garden layout this season.
ReplyDeleteLove the daffodils, what a wonderful color.
Congratulations! It looks wonderful! Isn't it awesome to have a project done!
ReplyDeleteAwesome work, we need to take up our wood deck out back and put in a patio, but it really does look like a bit more work then I'm up for right now. I'll stick to weeding out the garden areas and possibly laying something down to keep them from coming back. And a new shed... a new shed is a must this spring/summer.
ReplyDeleteIt looks really nice! That sounds like a big job. I'm interested to learn more about where the hose is. Is there a pipe under the patio? I get so sick of mine dragging the hose across our deck. Maybe the Blue Star Creeper will make a comeback. Some of mine dies all the way back during winter.
ReplyDeleteHi Catherine,
ReplyDeleteI simply put a length of PVC piping under the patio about a foot down with rounded PVC pieces at both ends. The pipe has an internal diameter that is larger than the outer diameter of the hose that we'll put inside of it.
The "hose hidey's" are underground sprinkler covers that have pre-drilled holes on two sides allowing for the PVC to go through. I put a good shovel full of gravel below and around the covers to allow for water drainage.
In addition to the PVC pipe, PVC bends and Sprinkler covers, you'll need to purchase PVC cement. The instructions for the PVC cement are on the container.
Hope this helps. :)
The underground hose is an excellent idea. Your pavers look great. Lots and lots of work there. And that shrub you asked about is Japanese Holly. Nearly indestructible. Prefers sun, does fine in shade. Grows very slowly.
ReplyDeleteThanks Kelly! I bet I can kill it :) I have disliked it since we moved in--but saw some merit thru the winter when it was the only green in the garden.
ReplyDelete